|
|

|
| Lantern slides and how to make them yourself (part 1) |
|
PAINTING
ON GLASS The earliest slides were all hand-drawn and some of them were an unique work of art. Images painted by hand on glass were produced in many different ways, each having its own characteristics. A lot of articles in magic lantern magazines and chapters in slide-painting instruction books in the second half of the nineteenth century describe every aspect of painting those slides in detail: the transparent pigments, mediums and varnishes to be used, the skills and dexterity, and the tools and equipment needed. Painting upon glass is anything but easy. The surface is slippery and the applied colours could easy flow into each other. The painted images are very small and reveal even the smallest aberrations when highly enlarged upon the screen. Both oil paints and water colours have been in use, though most of the slides are painted in oils. The changing technology of the magic lantern influenced the way in which the images were painted and manufactured. In particular the invention of better illuminants and optical systems demanded extremely detailed transparent paintings. |
|
|
|
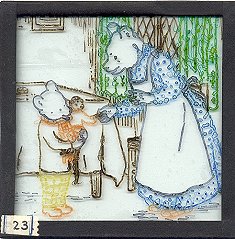
| Rupert the Bear's adventures. Probably traced in coloured ink from an existing drawing. It's remarkable that only the outlines are coloured and not the surfaces. |
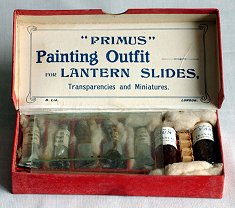
Primus Magic Lantern Slide Painting Outfit. A complete set with 5 tubes of paint, glass plates, varnish etc. |
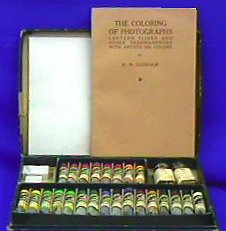
Magic Lantern Slide and
Photo Painting Kit. 'Photocol
outfit No. 24' -1946. This box (6.25" x 9", 16 x 23 cm) contains a complete set of paint, two little porcelain pans for the bottles of finish glaze and a palette board. The instruction book by H.N. Durham has 36 pages. |
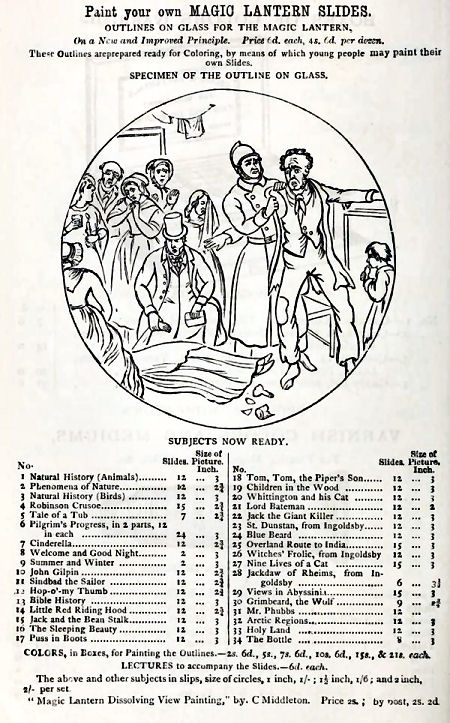
 OUTLINE SLIDES
The leading British manufacturer of magic lanterns and slides Carpenter and Westley was the first to use particular manufacturing processes for the multiple production of magic lantern slides. This was done by transferring the engraved black outlines of an image on to glass for subsequent hand-colouring by professional slide painters. The English firm Brodie & Middleton is well known for their production of outline slides, intended to be coloured by the hobbyist purchaser. 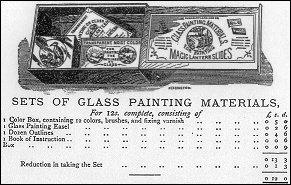 A
complete set of glass painting materials contained mostly some twelve colours,
brushes, fixing varnish, one dozen outline slides, an easel and an
instruction book. The set was sold for 12
shillings. In 1876 Charles
Middleton published some small books about the subject. At this time the
company advertised a selection of circa 400 outline slides, including
children’s subjects. A
complete set of glass painting materials contained mostly some twelve colours,
brushes, fixing varnish, one dozen outline slides, an easel and an
instruction book. The set was sold for 12
shillings. In 1876 Charles
Middleton published some small books about the subject. At this time the
company advertised a selection of circa 400 outline slides, including
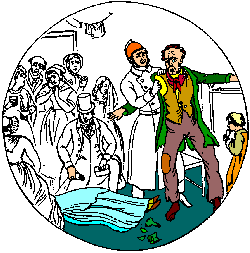
children’s subjects.The picture shows one of a set of eight B&M's ‘outline only’ glasses of the dramatic series 'The Bottle', drawn from the well known engravings by George Cruikshank (No 34 in their catalogue). |
 |
|
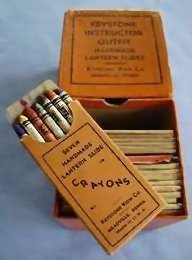
KEYSTONE MAGIC LANTERN HANDMADE SLIDES & CRAYONS The American Keystone company,
producer of many sets of high quality lantern slides, put this set of
crayons on the market. The little box of crayons is marked:
SEVEN HANDMADE LANTERN SLIDE CRAYONS
KEYSTONE VIEW CO. MEADVILLE, PENNA. MADE IN U.S.A. |
|
 |
 |

 |
 |
|
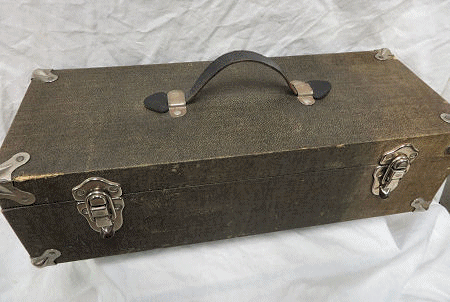
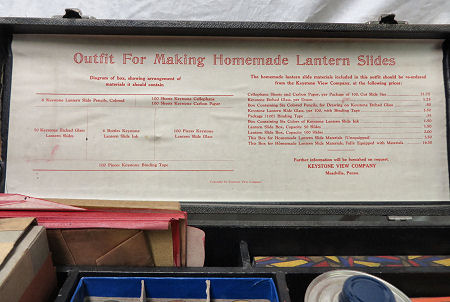
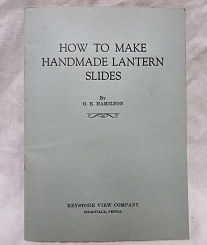
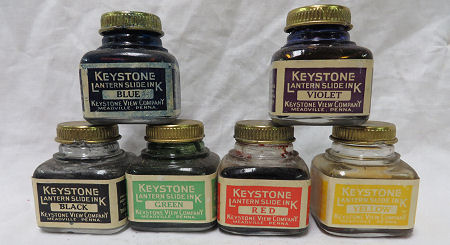
"Outfit For Making Homemade Lantern Slides" Keystone
View Co. Meadville, Penna. The cloth covered wooden box is 17" long, 5"
tall, and 6 3/4" deep (c. 43 x 12,5 x 17 cm). Included in the kit: "How To Make Handmade Lantern Slides" by G.E. Hamilton Copyright 1944 Keystone View Co. 24 pages. 6 Jars of Keystone ink. Tin for Keystone solvent. 2 Boxes Keystone crayons; 7 crayons in each box. Box of 6 Keystone Lantern Slide Pencils. 5 Rolls Keystone binding tape. Unknown number of sheets of carbon paper. Unknown number of sheets of cellophane. About 60 pieces of glass to make slides. |
|
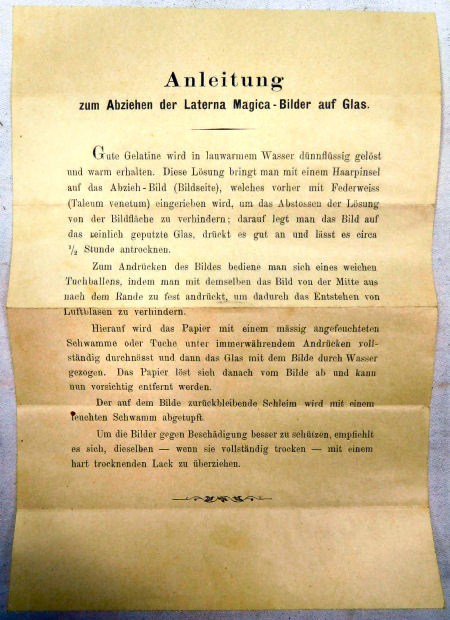
DECALCOMANIA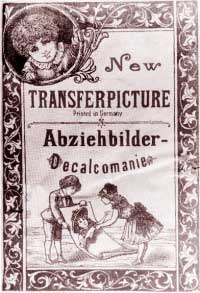 By the difficult term Decalcomania we describe the technique of transferring pictures
from specially prepared paper to surfaces such as glass, china, pottery etc.
In the world of magic lanterns we specifically mean the application of this
process while making a lantern slide by transferring an image on a square or
oblong piece of glass. The technique was used by professional slide makers, but
enjoyed a vogue among amateurs too. Porous paper was coated with a solution
of starch, albumen and glycerine. The coloured pictures were printed,
details first, background last, and then finished by a coat of glue. For
home use the pictures were supplied on sheets, By the difficult term Decalcomania we describe the technique of transferring pictures
from specially prepared paper to surfaces such as glass, china, pottery etc.
In the world of magic lanterns we specifically mean the application of this
process while making a lantern slide by transferring an image on a square or
oblong piece of glass. The technique was used by professional slide makers, but
enjoyed a vogue among amateurs too. Porous paper was coated with a solution
of starch, albumen and glycerine. The coloured pictures were printed,
details first, background last, and then finished by a coat of glue. For
home use the pictures were supplied on sheets,  sometimes
complete with the empty glasses. After cutting out the pictures they were
moistened and transferred to the glass. When the paper was removed the pictures
remained on the glass plate. sometimes
complete with the empty glasses. After cutting out the pictures they were
moistened and transferred to the glass. When the paper was removed the pictures
remained on the glass plate.The famous British Company W. Butcher & Sons produced this kind of slides using the 'Primus' trademark in their well known series Junior Lecturers Lantern Slides. The firm also sold paper sheets printed with complete sets, supplied for purchasers to make their own slides. Also the German company of Unger und Hoffmann, maker of the well known 'Projektion für Alle' series, produced sheets of 'Hochfeine Abziehbilder' for home use, complete with instructions. Around 1889 the English firm Theobald & Co. supplied lithographic transfers in sheets, intended for slide production by the purchaser, and slides on special transparent paper, for placing between two glass plates. The paper was lithographically printed and made translucent by an application of an oily liquid made of creosote and turpentine. It's difficult to distinguish these slides from the ordinary, but the word 'Patent' in the right hand bottom corner and a silvery sheen at the border may help. |
|
|
|
|
|
Two sheets of lithographic transfers for making your own magic lantern
slides, the first for making slides of about 8 x 8 cm, the second for making
elongated slides. These sheets were sold around 1900. |
|
 |
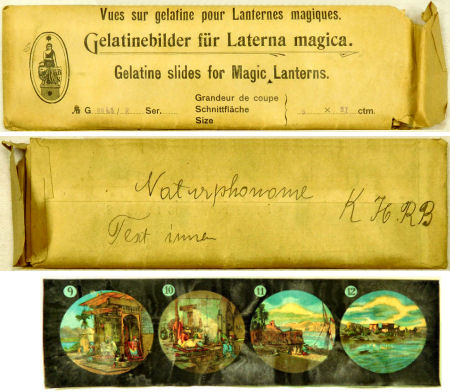  Gelatinebilder für Laterna Magica, Gelatine slides for Magic Lanterns. Package with twelve gelatine slides made by the Gebrüder Bing, Nuremberg (G.B.N.), complete with directions for use. The package shows Bing's trade mark as it was in use from 1890 - 1906. |
PHOTOGRAPHIC
SLIDES.
 Amateur
photography was advanced by the introduction of the gelatine dry plate in
the late 19th century. Unfortunately the gelatine-bromide plates were not
suitable for projection because their grain was too coarse. Dry plates
coated with gelatine-silver chloride, adapted to transparency work, were
produced from 1881 by various manufacturers like Ilford, Agfa, Kodak and
Lumičre. These plates could be coated mechanically and were sold
comparatively cheaply. Amateur
photography was advanced by the introduction of the gelatine dry plate in
the late 19th century. Unfortunately the gelatine-bromide plates were not
suitable for projection because their grain was too coarse. Dry plates
coated with gelatine-silver chloride, adapted to transparency work, were
produced from 1881 by various manufacturers like Ilford, Agfa, Kodak and
Lumičre. These plates could be coated mechanically and were sold
comparatively cheaply.
 The
picture could be toned in a single colour ranging from blue to brownish
red (sepia).
The
picture could be toned in a single colour ranging from blue to brownish
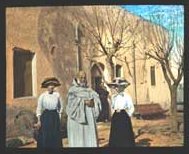
red (sepia).Photographic slides could be made by modifying a negative glass plate into positive glass slides. This could be done in two different ways: if no reduction or enlargement was needed, the slide could be printed by laying the negative directly on the glass plate (contact print) and exposing it; if the format had to be changed to match the standard measures of the slide, a copy camera had to be employed. Photographic slides were sometimes painted over by hand in translucent colours. The standard formats were 3 Ľ inches square, or 3 Ľ x 4 inches in the USA. |
|
|
|
|
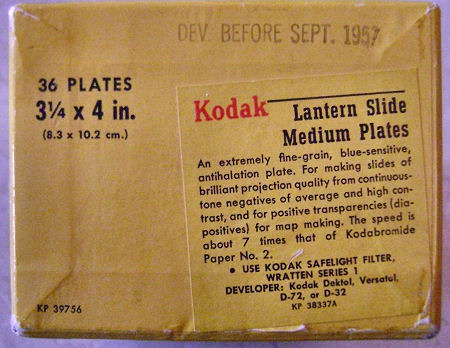
Cardboard box with 36 undeveloped Kodak lantern
slides.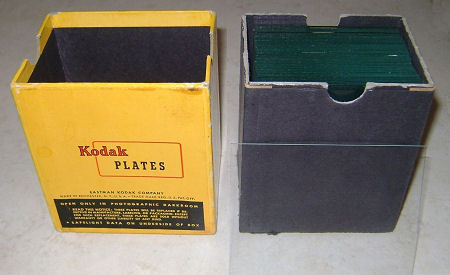 |
 |
 KEYSTONE VIEW CO. MEADVILLE, PENNA.
 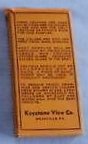 The
back of the box says: THESE CRAYONS ARE MADE SOLELY FOR USE ON ETCHED GLASS AND ARE THE ONLY CRAYONS OR
PENCILS MADE FOR THIS PURPOSE. THE COLORS ARE RICH AND FREE FROM DARK STREAKS. BEST RESULTS WILL BE OBTAINED
BY USING HIGH GRADE MUD-GROUND ETCHED GLASS. KEYSTONE ETCHED GLASS IS THE BEST. CRAYONS SHOULD NOT BE SHARPENED
WITH A KNIFE. A PIECE OF SAND PAPER LIKE THE ONE ENCLOSED SHOULD BE USED. TO REMOVE PENCIL DRAWINGS AND CRAYON
COLORS FROM ETCHED GLASS A FEW DROPS OF HOUSEHOLD OIL FOLLOWED BY SOAP AND WATER WILL GIVE THE BEST RESULTS.
PRICES: BOX OF SEVEN KEYSTONE CRAYONS 90˘. INDIVIDUAL CRAYONS, EACH 15˘ KEYSTONE VIEW CO. MEADVILLE,
PENNA.
The
back of the box says: THESE CRAYONS ARE MADE SOLELY FOR USE ON ETCHED GLASS AND ARE THE ONLY CRAYONS OR
PENCILS MADE FOR THIS PURPOSE. THE COLORS ARE RICH AND FREE FROM DARK STREAKS. BEST RESULTS WILL BE OBTAINED
BY USING HIGH GRADE MUD-GROUND ETCHED GLASS. KEYSTONE ETCHED GLASS IS THE BEST. CRAYONS SHOULD NOT BE SHARPENED
WITH A KNIFE. A PIECE OF SAND PAPER LIKE THE ONE ENCLOSED SHOULD BE USED. TO REMOVE PENCIL DRAWINGS AND CRAYON
COLORS FROM ETCHED GLASS A FEW DROPS OF HOUSEHOLD OIL FOLLOWED BY SOAP AND WATER WILL GIVE THE BEST RESULTS.
PRICES: BOX OF SEVEN KEYSTONE CRAYONS 90˘. INDIVIDUAL CRAYONS, EACH 15˘ KEYSTONE VIEW CO. MEADVILLE,
PENNA.
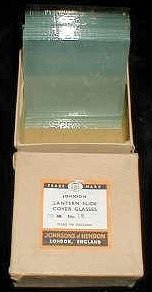
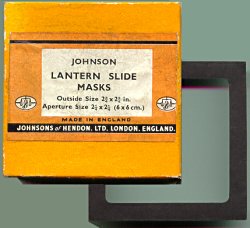 no longer mounted in wooden frames, but simply were edge-bound
with a cover glass, almost always a mask of thin black opaque paper was
placed between the cover glass and image glass. The masks were cut to the
same external dimensions of the glasses and with apertures of various
shapes and sizes. They mainly served to exclude extraneous details at the
edge of the picture, but also to mask the shortcomings of simple lenses,
which tended to cause some distortion towards the edges of the picture.
Sometimes a nice effect was created by giving the mask a special form,
like the shape of a heart or a keyhole.
no longer mounted in wooden frames, but simply were edge-bound
with a cover glass, almost always a mask of thin black opaque paper was
placed between the cover glass and image glass. The masks were cut to the
same external dimensions of the glasses and with apertures of various
shapes and sizes. They mainly served to exclude extraneous details at the
edge of the picture, but also to mask the shortcomings of simple lenses,
which tended to cause some distortion towards the edges of the picture.
Sometimes a nice effect was created by giving the mask a special form,
like the shape of a heart or a keyhole.
 |
 |
|
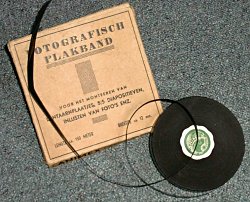
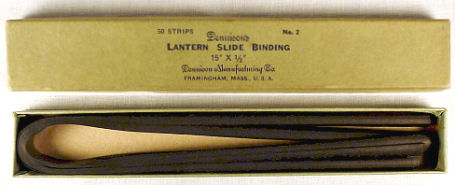
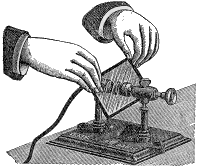
This
simple slide-binding clamp is a useful device for clamping the components of a
slide - picture glass, paper mask and cover glass - to allow both hands to
be used for applying the edge-binding tape. Picture left: Dutch slide binding tape, produced by Animex. |
|
| More about do-it-yourself slides on the next page. |
|
| |
©1997-2023 'de Luikerwaal' All rights reserved. Last update: 08-06-2023. |